Create Your Own Blog With Hugo and Github Pages

In this post we will explore how we can setup our own blog using Hugo which claims to be “The world’s fastest framework for building websites”. And for hosting, we will use Github pages and automatic deployments using Github Actions workflow.
So let’s get started, shall we?
The Github.io Repository
If you have a Github.com account, you can create your personal static website easily by creating a special repository with name "<your-github-user-name>.github.io".

- By default, you’ll be able to see the contents of the README.md file by opening the link "<your-github-user-name>.github.io".
- You can place an index.html file along with other static content (css, images, js, etc files) in the repository to render your desired website content.
Elaborate steps to setup your own Github pages website can be found here
Problem: We have found a way to host our static website for free but we need to still create our actual website, which can become quite tedious if you do it from scratch.
To overcome this problem, we can use any of the static site generators available in the market, for example Jekyll, Hugo, and many more. However, we will limit ourselves to using Hugo and try to build our site using that.
Hugo
Hugo is one of the most popular open-source static site generators. With its amazing speed and flexibility, Hugo makes building websites fun again.
Install and Setup
Install using Homebrew:
brew install hugo
for other methods if installing, please refer this
Creating a new site (your blog), it’s better to create it as a sub-folder inside your github.io repository:
# clone you github.io repository
git clone https://github.com/<your-user-name>/<your-user-name>.github.io.git

# change directory into the cloned repository folder
cd <your-user-name>.github.io

# now create a blog site sub-folder named "blog" using hugo
hugo new site blog
You can then test you website in development mode using:
cd blog

hugo server -D
Adding Theme
There are lots of pre-built themes for you Hugo site, you can choose from this hugo themes gallery.
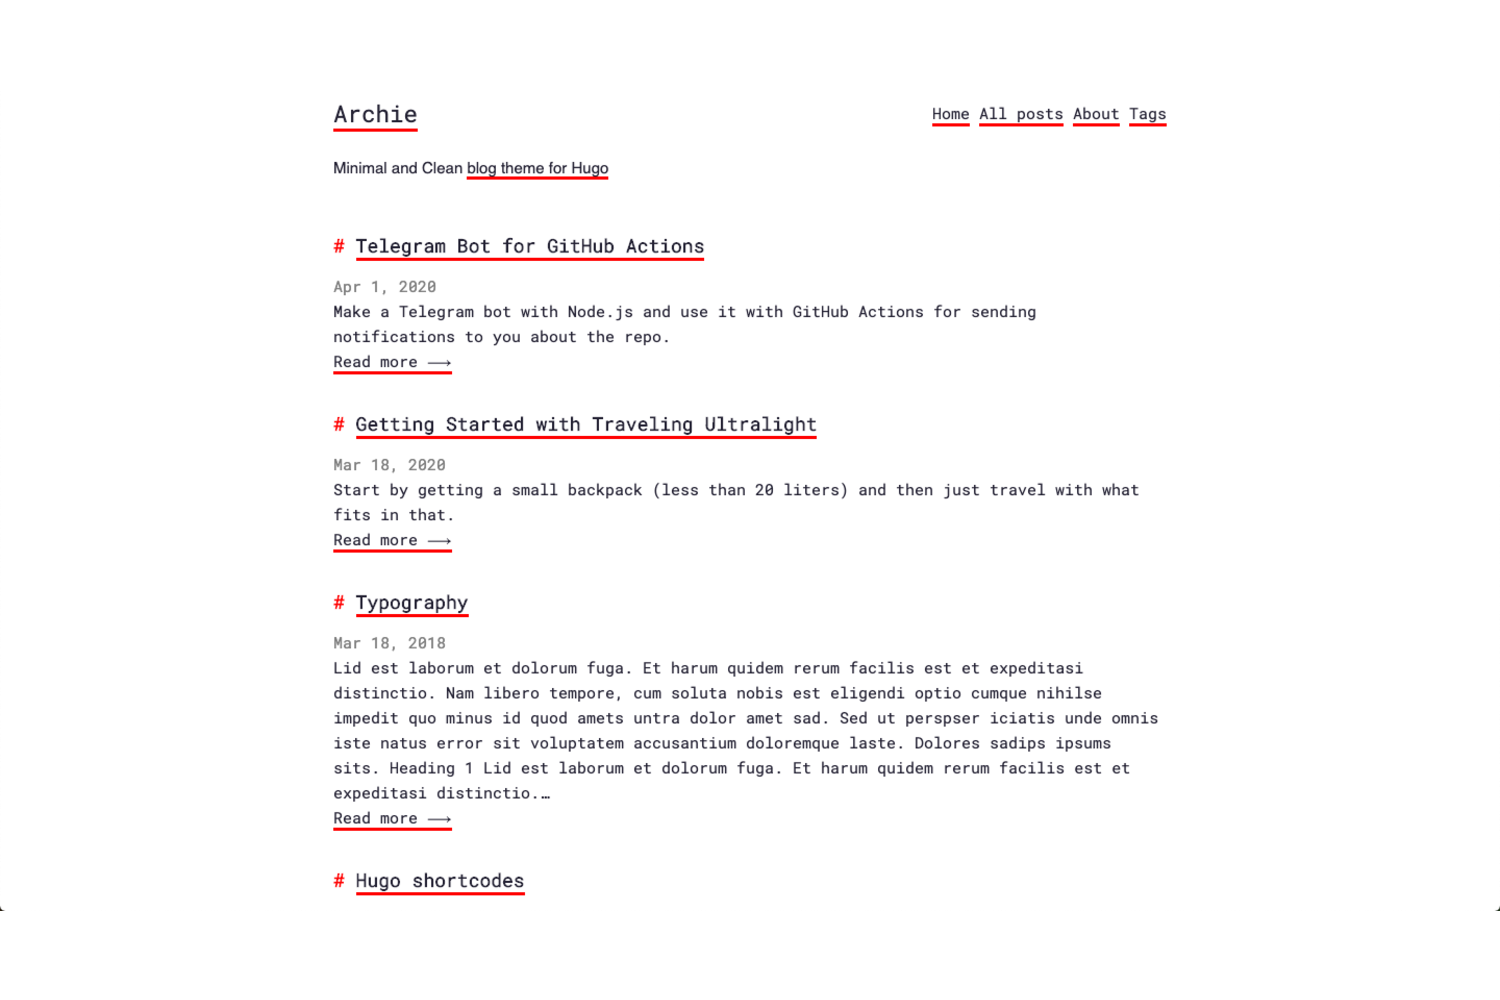
We will use archie theme for our blog, which looks something like:
cd blog
git submodule add https://github.com/athul/archie.git themes/ananke
Open blog/config.toml file in an editor and add the line:
theme = "archie"
Creating Posts
You can create a post by running the command hugo new posts/<any-subdirectory-to-be-created>/<name-of-the-post-with-hyphenated-words>.md in blog folder:
# make sure you are under hugo site folder
cd blog

hugo new posts/my-first-post.md
This will create a markdown file with name my-first-post.md under folder blog/content/posts with contents:
---
title: "My First Post"
date: 2022-08-14T16:06:48+05:30
draft: true
---
This is called the front-matter for your post and you can even add more metadata parameters like tags, description, subtitle, images etc. You can refer this for more details.
You can now edit this file and add content in markdown format.
Create posts inside sub-folder
# make sure you are under hugo site folder
cd blog

hugo new posts/my-first-post/index.md
This will create a folder named my-first-post containing index.md file with the same content instead of just one file.
This way we can have other static content like images/videos/gifs in out post folder and we can use those in our index.md file, this ways we can manage separate files for each post.
Starting Server & Building Deployable Static Content
Running Hugo server to see changes locally
$ hugo server -D

                   | EN
+------------------+----+
  Pages            | 10
  Paginator pages  |  0
  Non-page files   |  0
  Static files     |  3
  Processed images |  0
  Aliases          |  1
  Sitemaps         |  1
  Cleaned          |  0

Total in 11 ms
Watching for changes in /Users/bep/quickstart/{content,data,layouts,static,themes}
Watching for config changes in /Users/bep/quickstart/config.toml
Environment: "development"
Serving pages from memory
Running in Fast Render Mode. For full rebuilds on change: hugo server --disableFastRender
Web Server is available at http://localhost:1313/ (bind address 127.0.0.1)
Press Ctrl+C to stop
Building static content to deploy on any hosting side (github pages in our case)
hugo -D
This will translate our markdown content for our posts into HTML/CSS files in blog/public folder, which can directly be served for our website.
We can also use hugo --minify to have the minified static files for production deployment).
Github Actions
Github Actions workflow provide an out of the box CI/D (continuous integration / continuous deployment) for our code. We can provide the actions to be taken on our code (such as run commands, copy data etc.) based on activities being performed on the repository (branch push, merge etc.).
Setup Workflow to deploy Github.io site
Click on Actions tab on your repository page

Then, navigate New workflow -> setup a workflow yourself
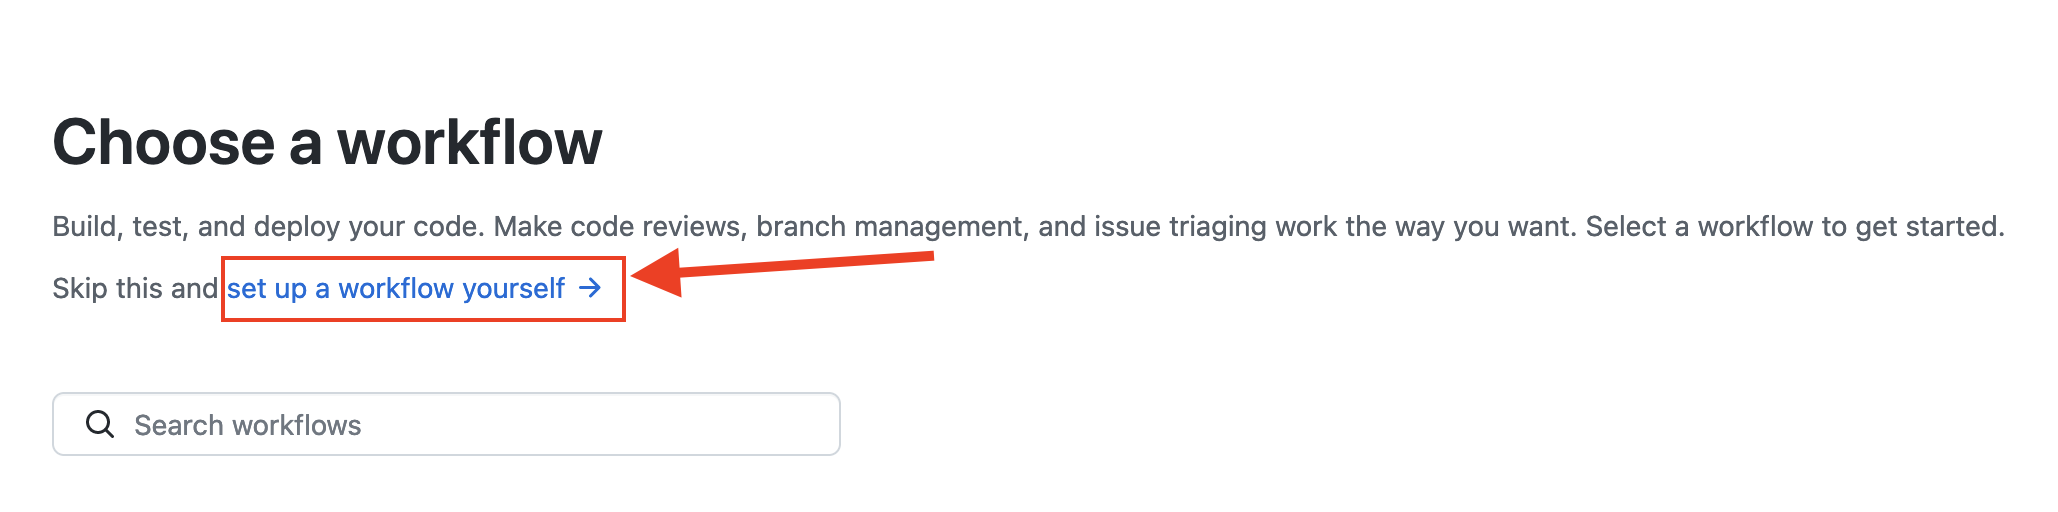
Here, you can define your workflow in YAML format.
This is the minimal setup to be required for Hugo deployment for deployment of your blog:
| |
The above workflow simply defines:
- Workflow is triggered when we push changes in “master” branch
- Runs the job “deploy” when triggered
- deploy has 3 steps:
- checkout the branch using built-in actions/checkout@v3 plugin
- setup hugo using 3rd party plugin named peaceiris/actions-hugo@v2, this installs hugo on the workflow system
- build by running command
hugo --minifyinside directly ./blog - deploy using 3rd party Github Pages plugin peaceiris/actions-gh-pages@v3, with publish directory as ./blog/public
Once this in place and well understood, click on Start commit, then Commit changes.
This will create a main.yml with the above content under .github/workflows folder in your repository, you can separately edit that later if required.
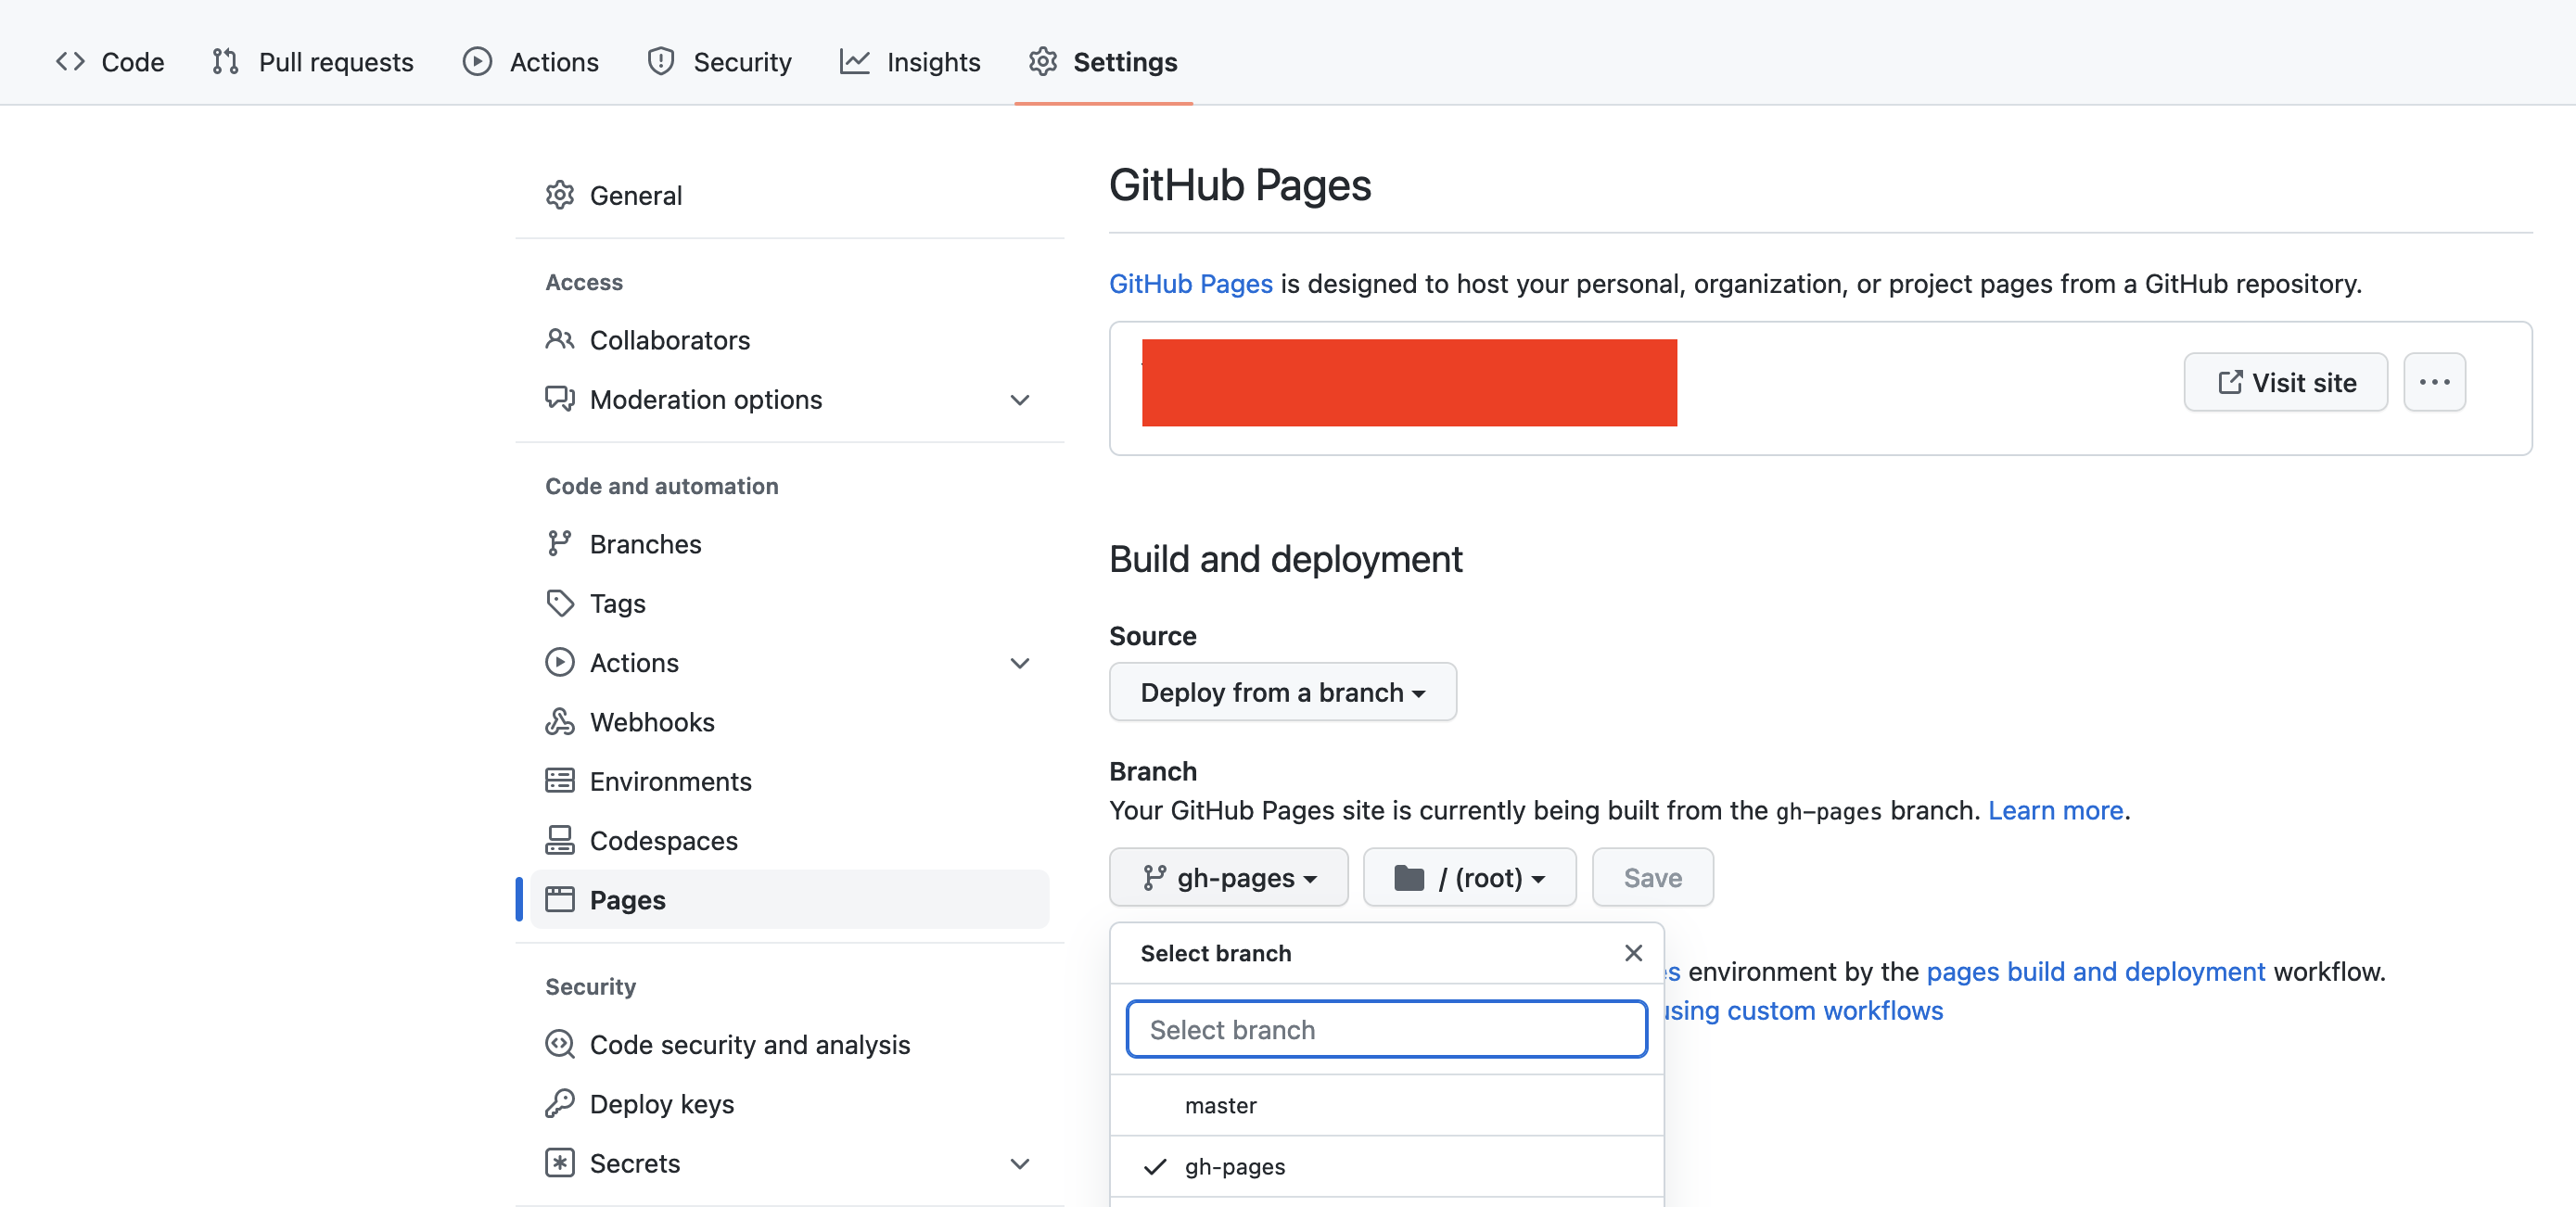
The gh-pages plugin used in the workflow actually creates another branch named gh-pages for deployment. So, to use that in our Github.io website we need to switch our deployment branch from master to gh-pages.
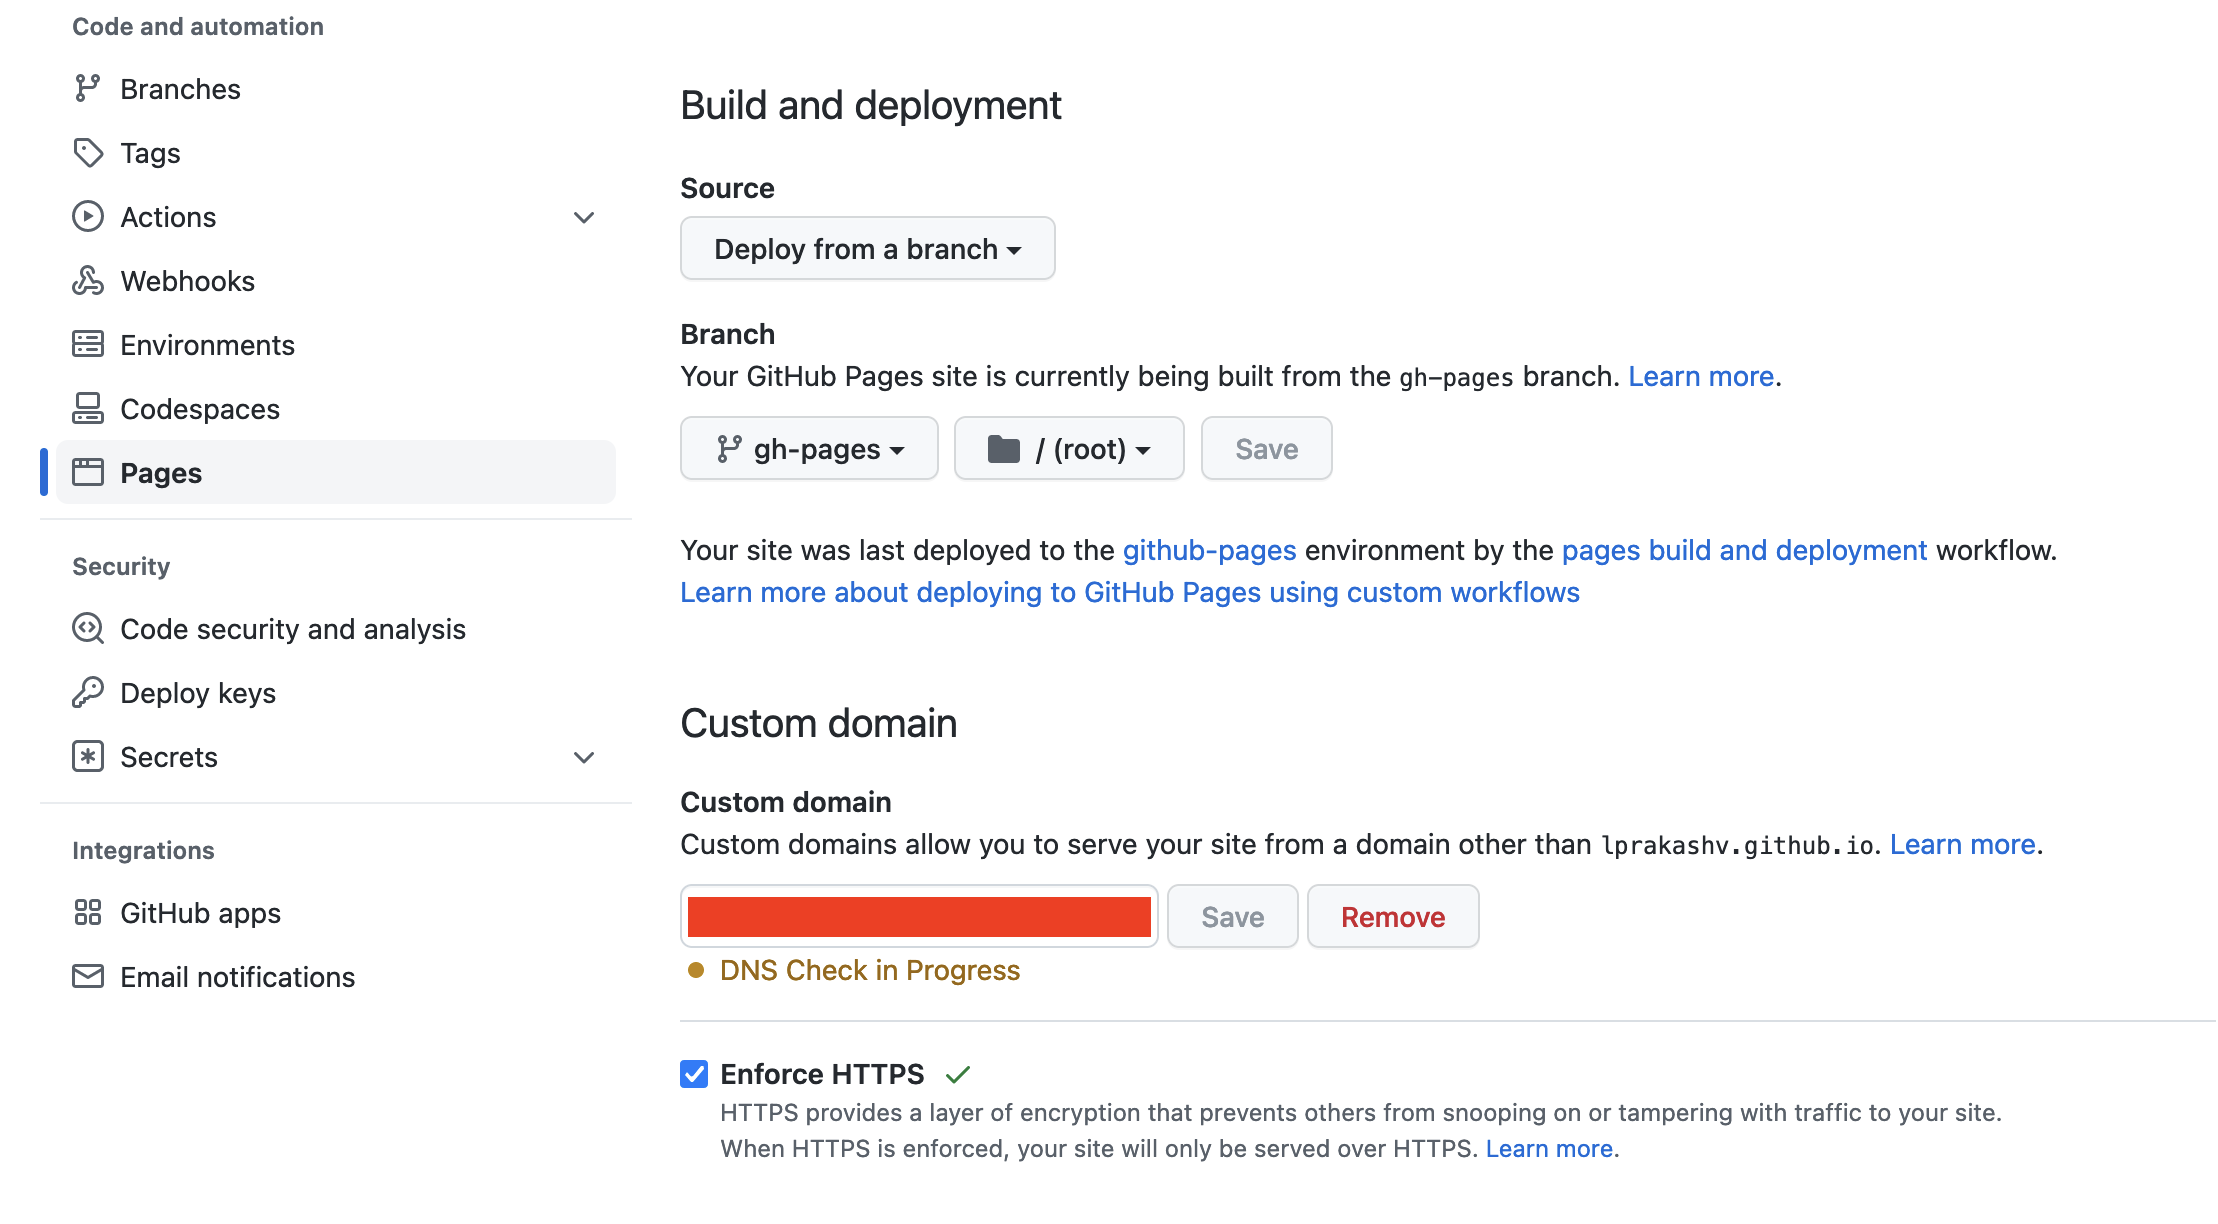
Click on Setting tab, then click on pages on side bar, then select the branch as gh-pages from Deploy from branch section:
Voila, now your blog site up and running! You can now go and open your website using <your-github-username>.github.io.
Setup your Custom Domain for Github.io site (optional)
If you already have purchased a domain for yourself, you can definitely use that to point to your blog site. You just need to update your DNS provider’s (mine is GoDaddy.com) settings to point to your Github.io website.
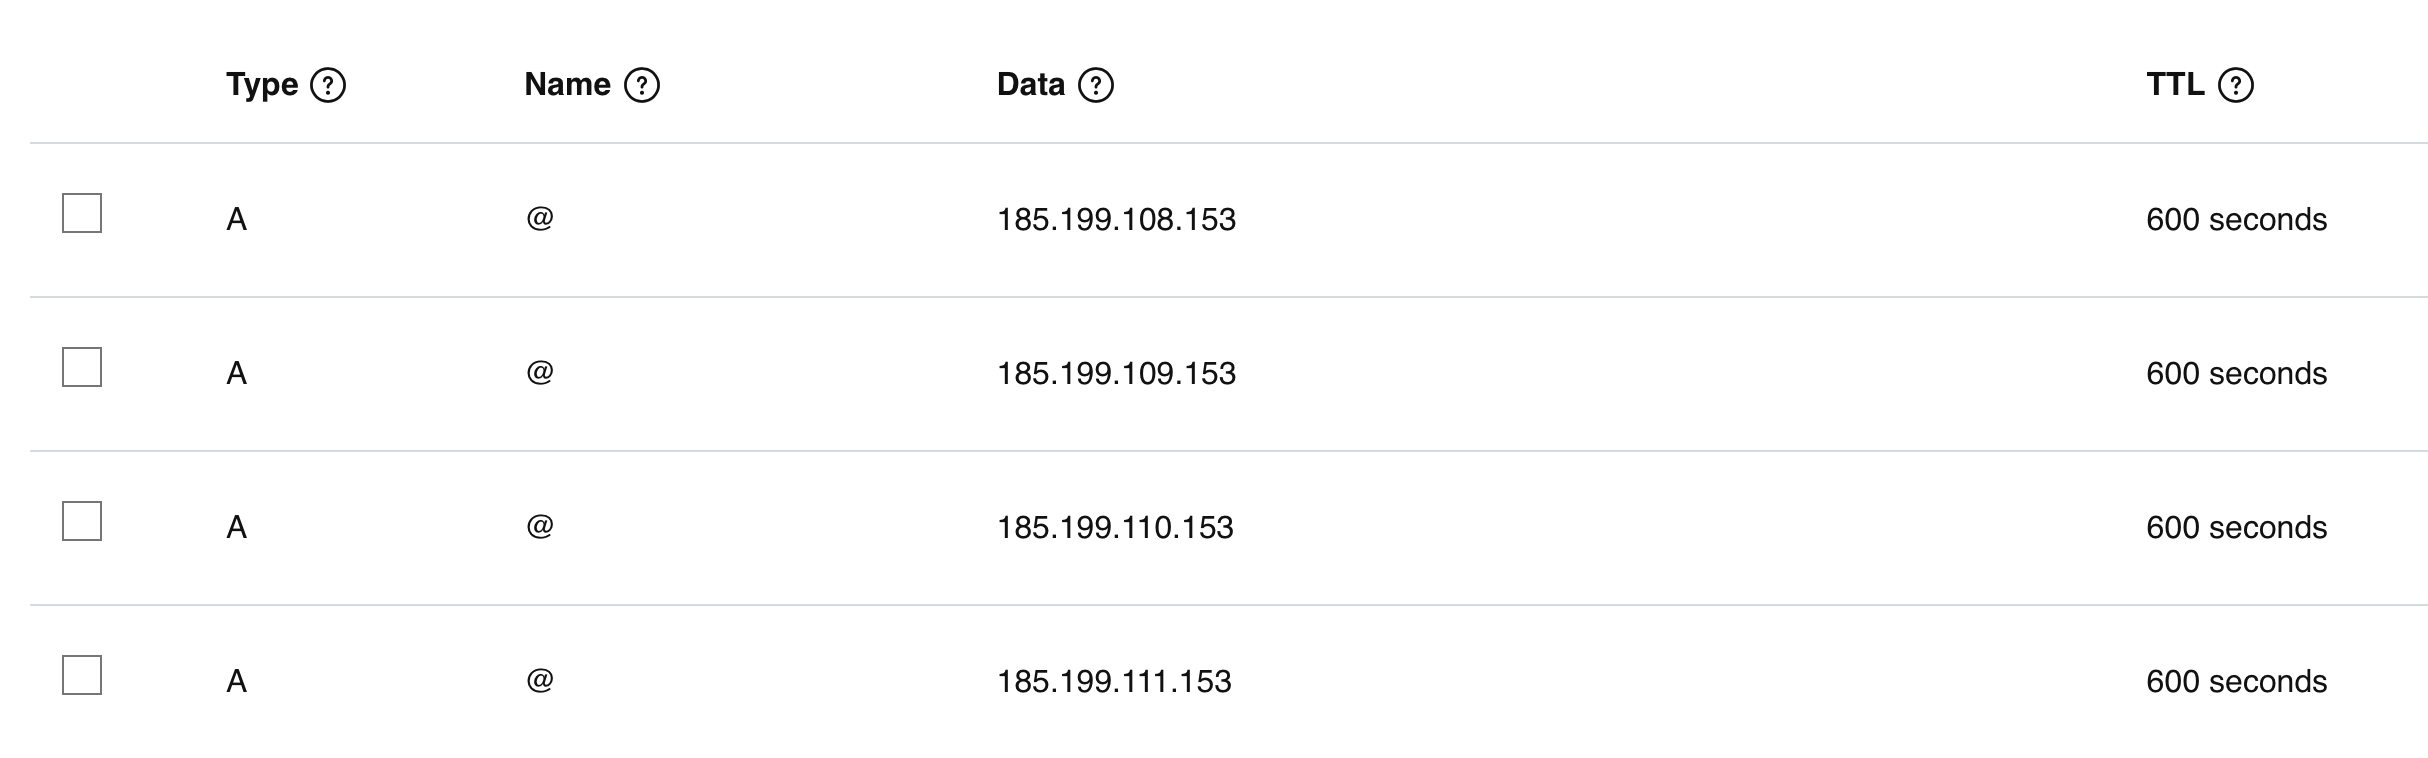
Update your DNS records:
- Edit the record with type “A” with value to IP address 185.199.108.153. This will point your custom domain to GitHub’s server over HTTPS.
- Edit the record with type “CNAME” with value as your Github.io website (<username>.github.io).
- Add 3 more type “A” records with values having IP addresses 185.199.109.153, 185.199.110.153, 185.199.111.153.

Now, setup your custom domain on you Github pages website.
Click on Settings tab, then click pages on side bar, then enter the Custom domain in the Custom domain section.
Now, to update automatic CNAME addition on gh-pages deployment, edit your Deploy (last) step workflow and add cname attirbute:
| |
Conclusion
In this article, we built and deployed our blog site from scratch and for free!
We touched upon various topics:
- Github pages and setting up your own user site
- Hugo static site generator and creating site and adding posts to the site using markdown
- Github Actions workflows and setting up a workflow to deploy your hugo site on each code push
- Setting up your custom domain to point to your Github pages website
Fin.